The Installation Process
Learn about our installation process and read about some of the unique projects we have had the honor of creating. From heirloom Roman art, to collaborative installations, we take great care in stewarding these visions to life. Years of setting tile and doing exterior hardscape work has given Liz the skillset to bring the most creative of ideas to fruition.
Roman Style Mosaic Installation
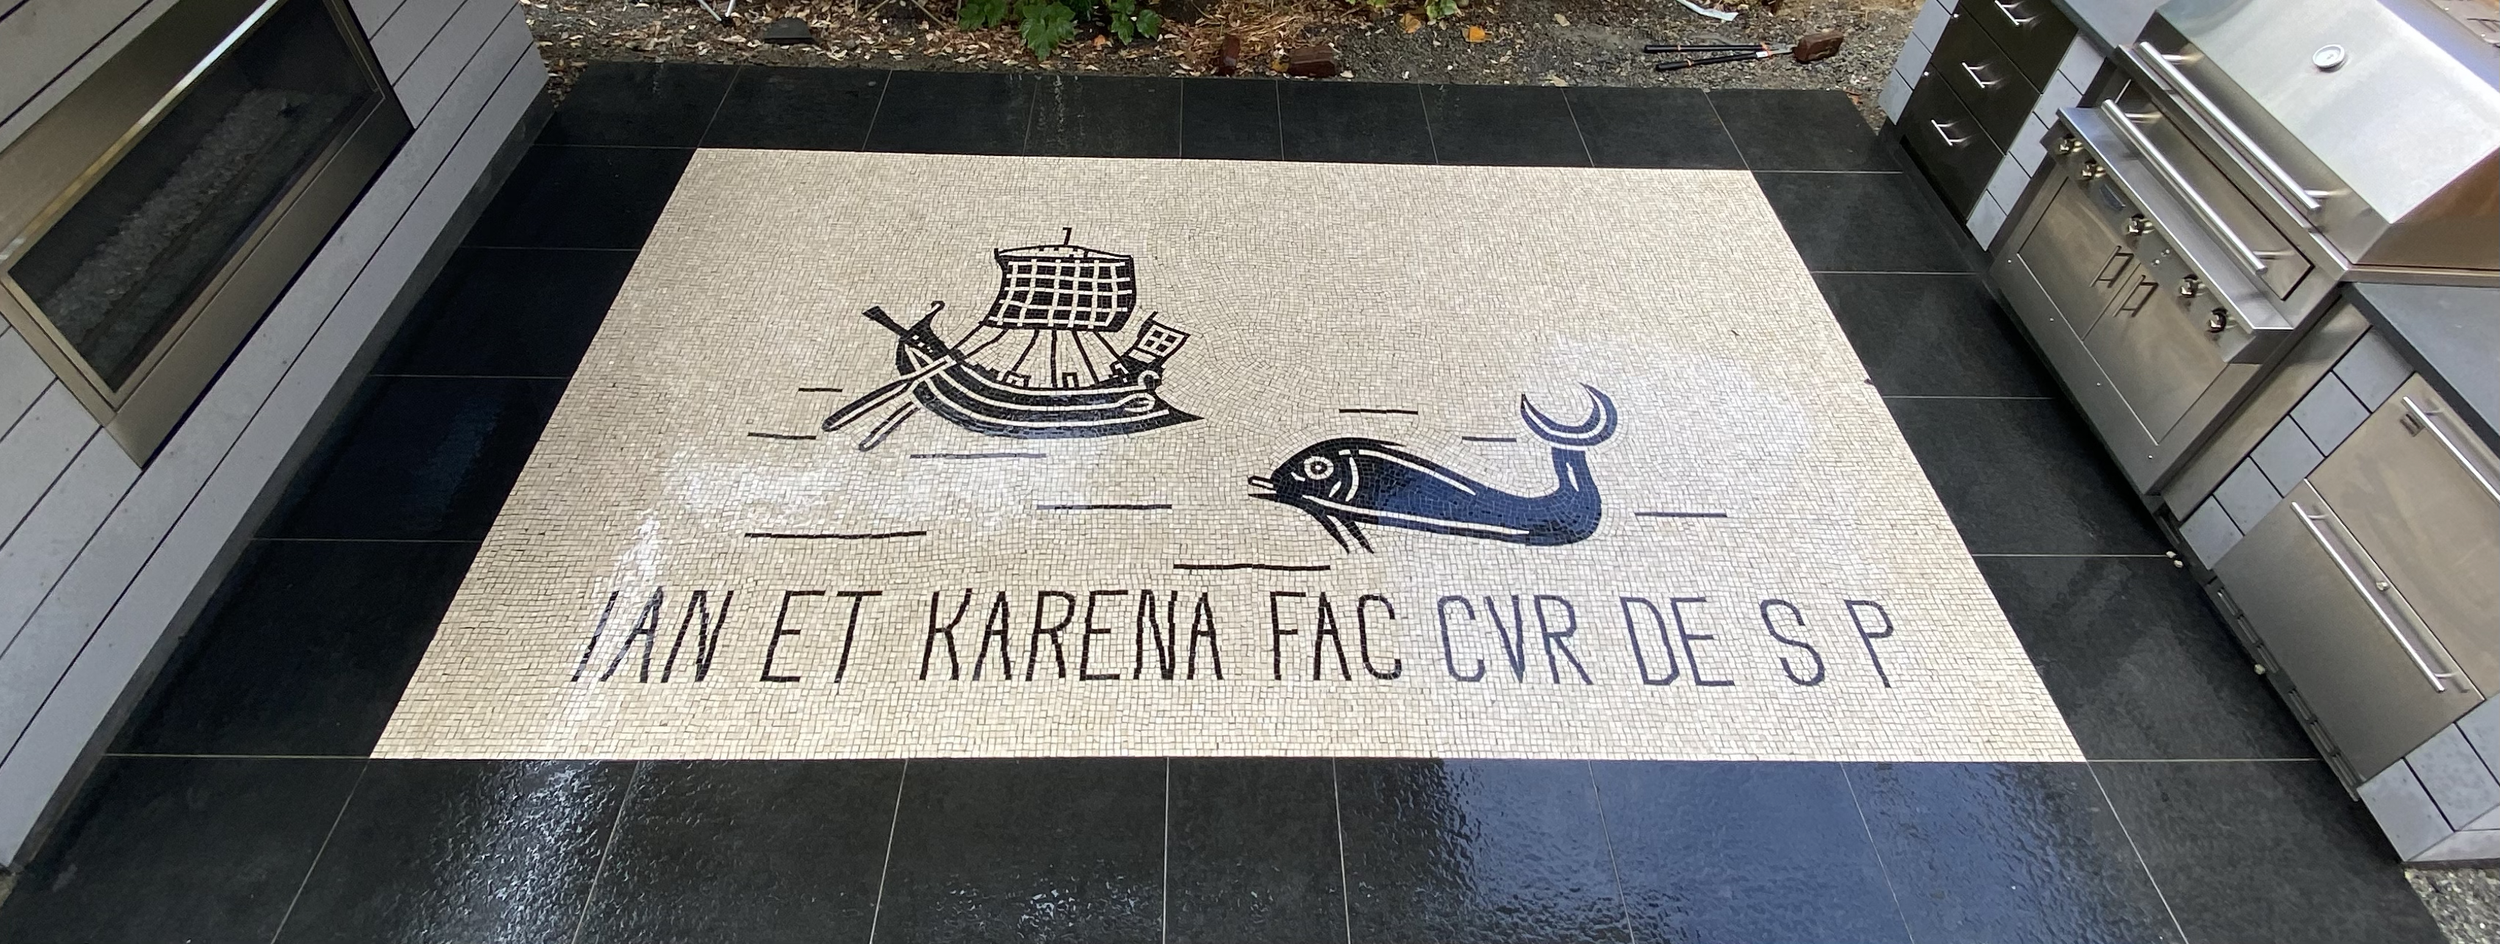
In the project shown here, Liz helped clients bring to life their vision of having a 4th century Roman ruin in their backyard. She was able to do a site visit to the actual ruins, speak with staff repairing the ruins, and source the materials to be custom fabricated for the job. She set the exterior basalt pavers, ensuring a flat and draining surface in additon to installing the mosaic itself.
An onsite visit allowed me to engage with an artisan repairing the 4th century ruins.
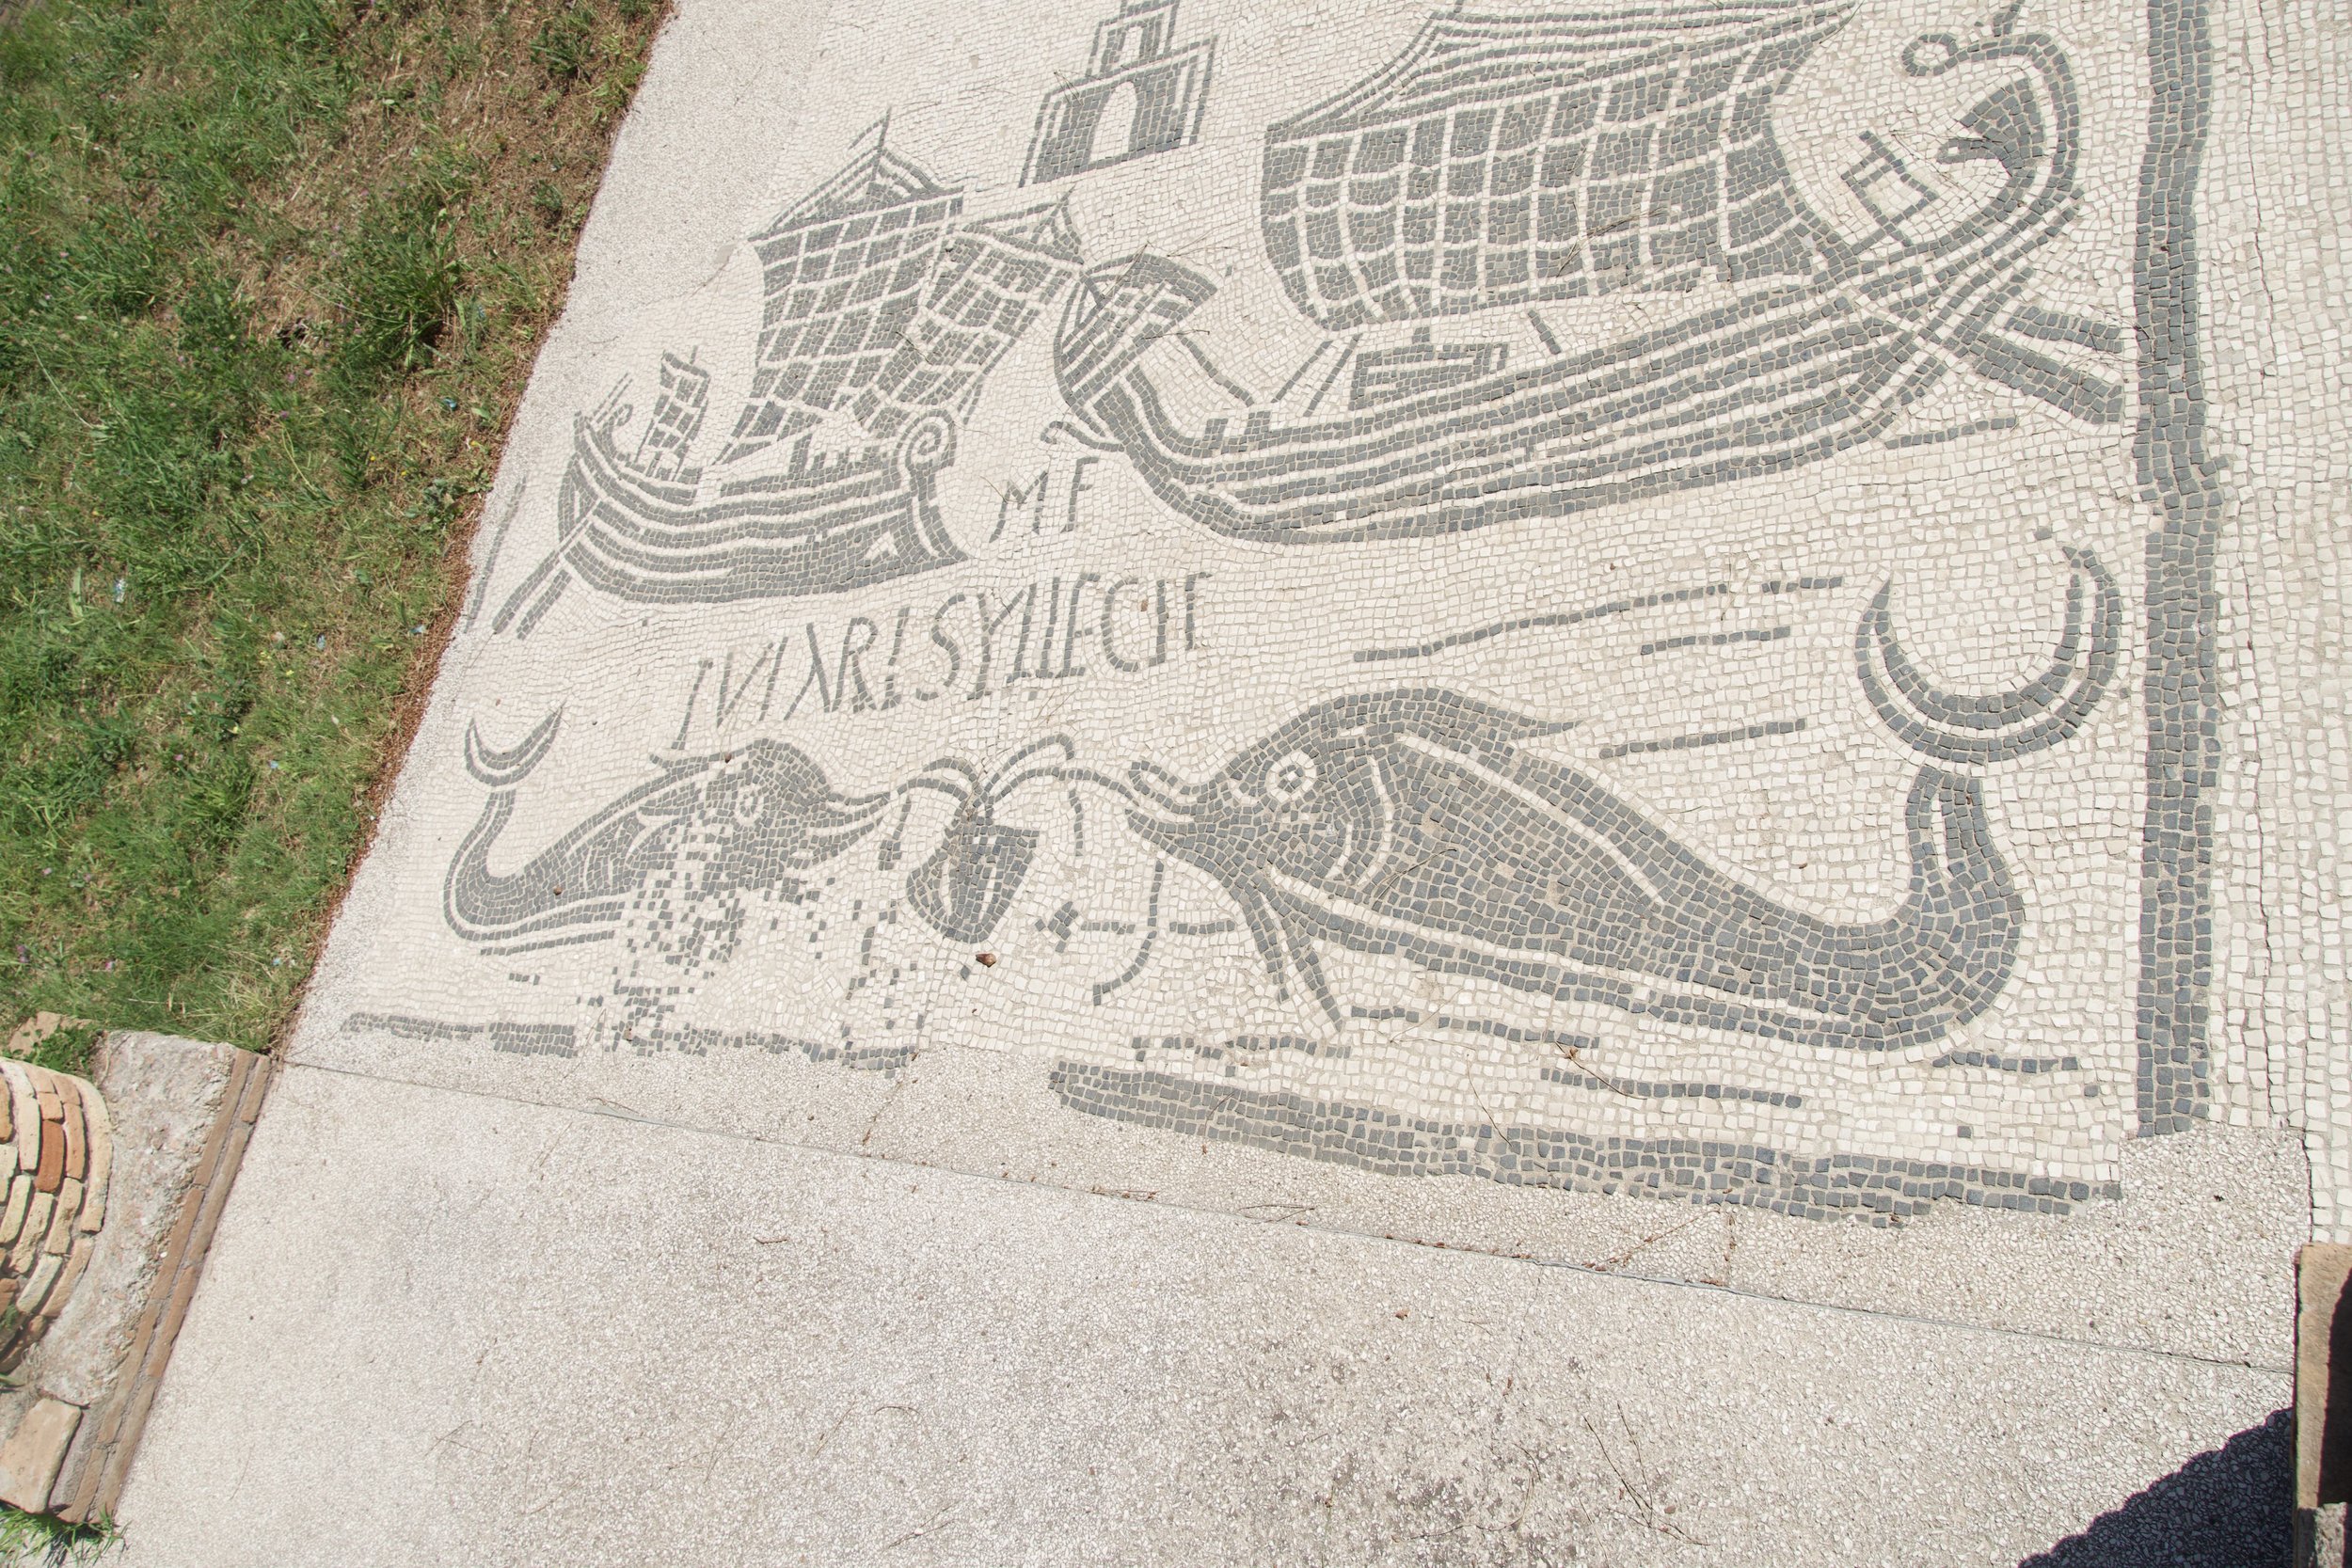
You can find this special piece in the ruins of Ostia, just outside Rome.
A close up of the original mosaics and the particular boat the clients wanted replicated in their own backyard.
Mongolian Basalt pavers lead up to the mosaic and define the border.
Triquetra
This project was a garage renovation that turned an unused garage into indoor living space with a heated travertine floor. The client in this case was someone near and dear to me, my mother, which played into her choice of this Celtic knot as a central design. The Triquetra she chose is an ancient Celtic symbol of the trinity: The Mother, Maiden and Crone. We have Celtic ancestry and both resonated with this powerful feminine symbol.
The finished floor
Here I'm looking at the natural color variation so that the red travertine is a continual loop.
A Memorial Under the Arbor
This piece was designed and installed in the summer of 2022 with the Seattle Children’s Playgarden. It was built in memory of Jenny Gamache, a mother, wife, special education teacher, and the founder of the summer programs for the Playgarden. I worked with the Playgarden’s director to come up with a design that honored Jenny and the community she left behind. We designed it so that her family and friends would take part in building the outside circle. We had about a dozen people come together to create the mosaic designs on the outside of the central flower. It is the space where the preschool children gather daily for their circle time. You can check it out yourself at Seattle Public Parks’ Colman Playground, under the arbor.
Heirloom Scandinavian Art Installation
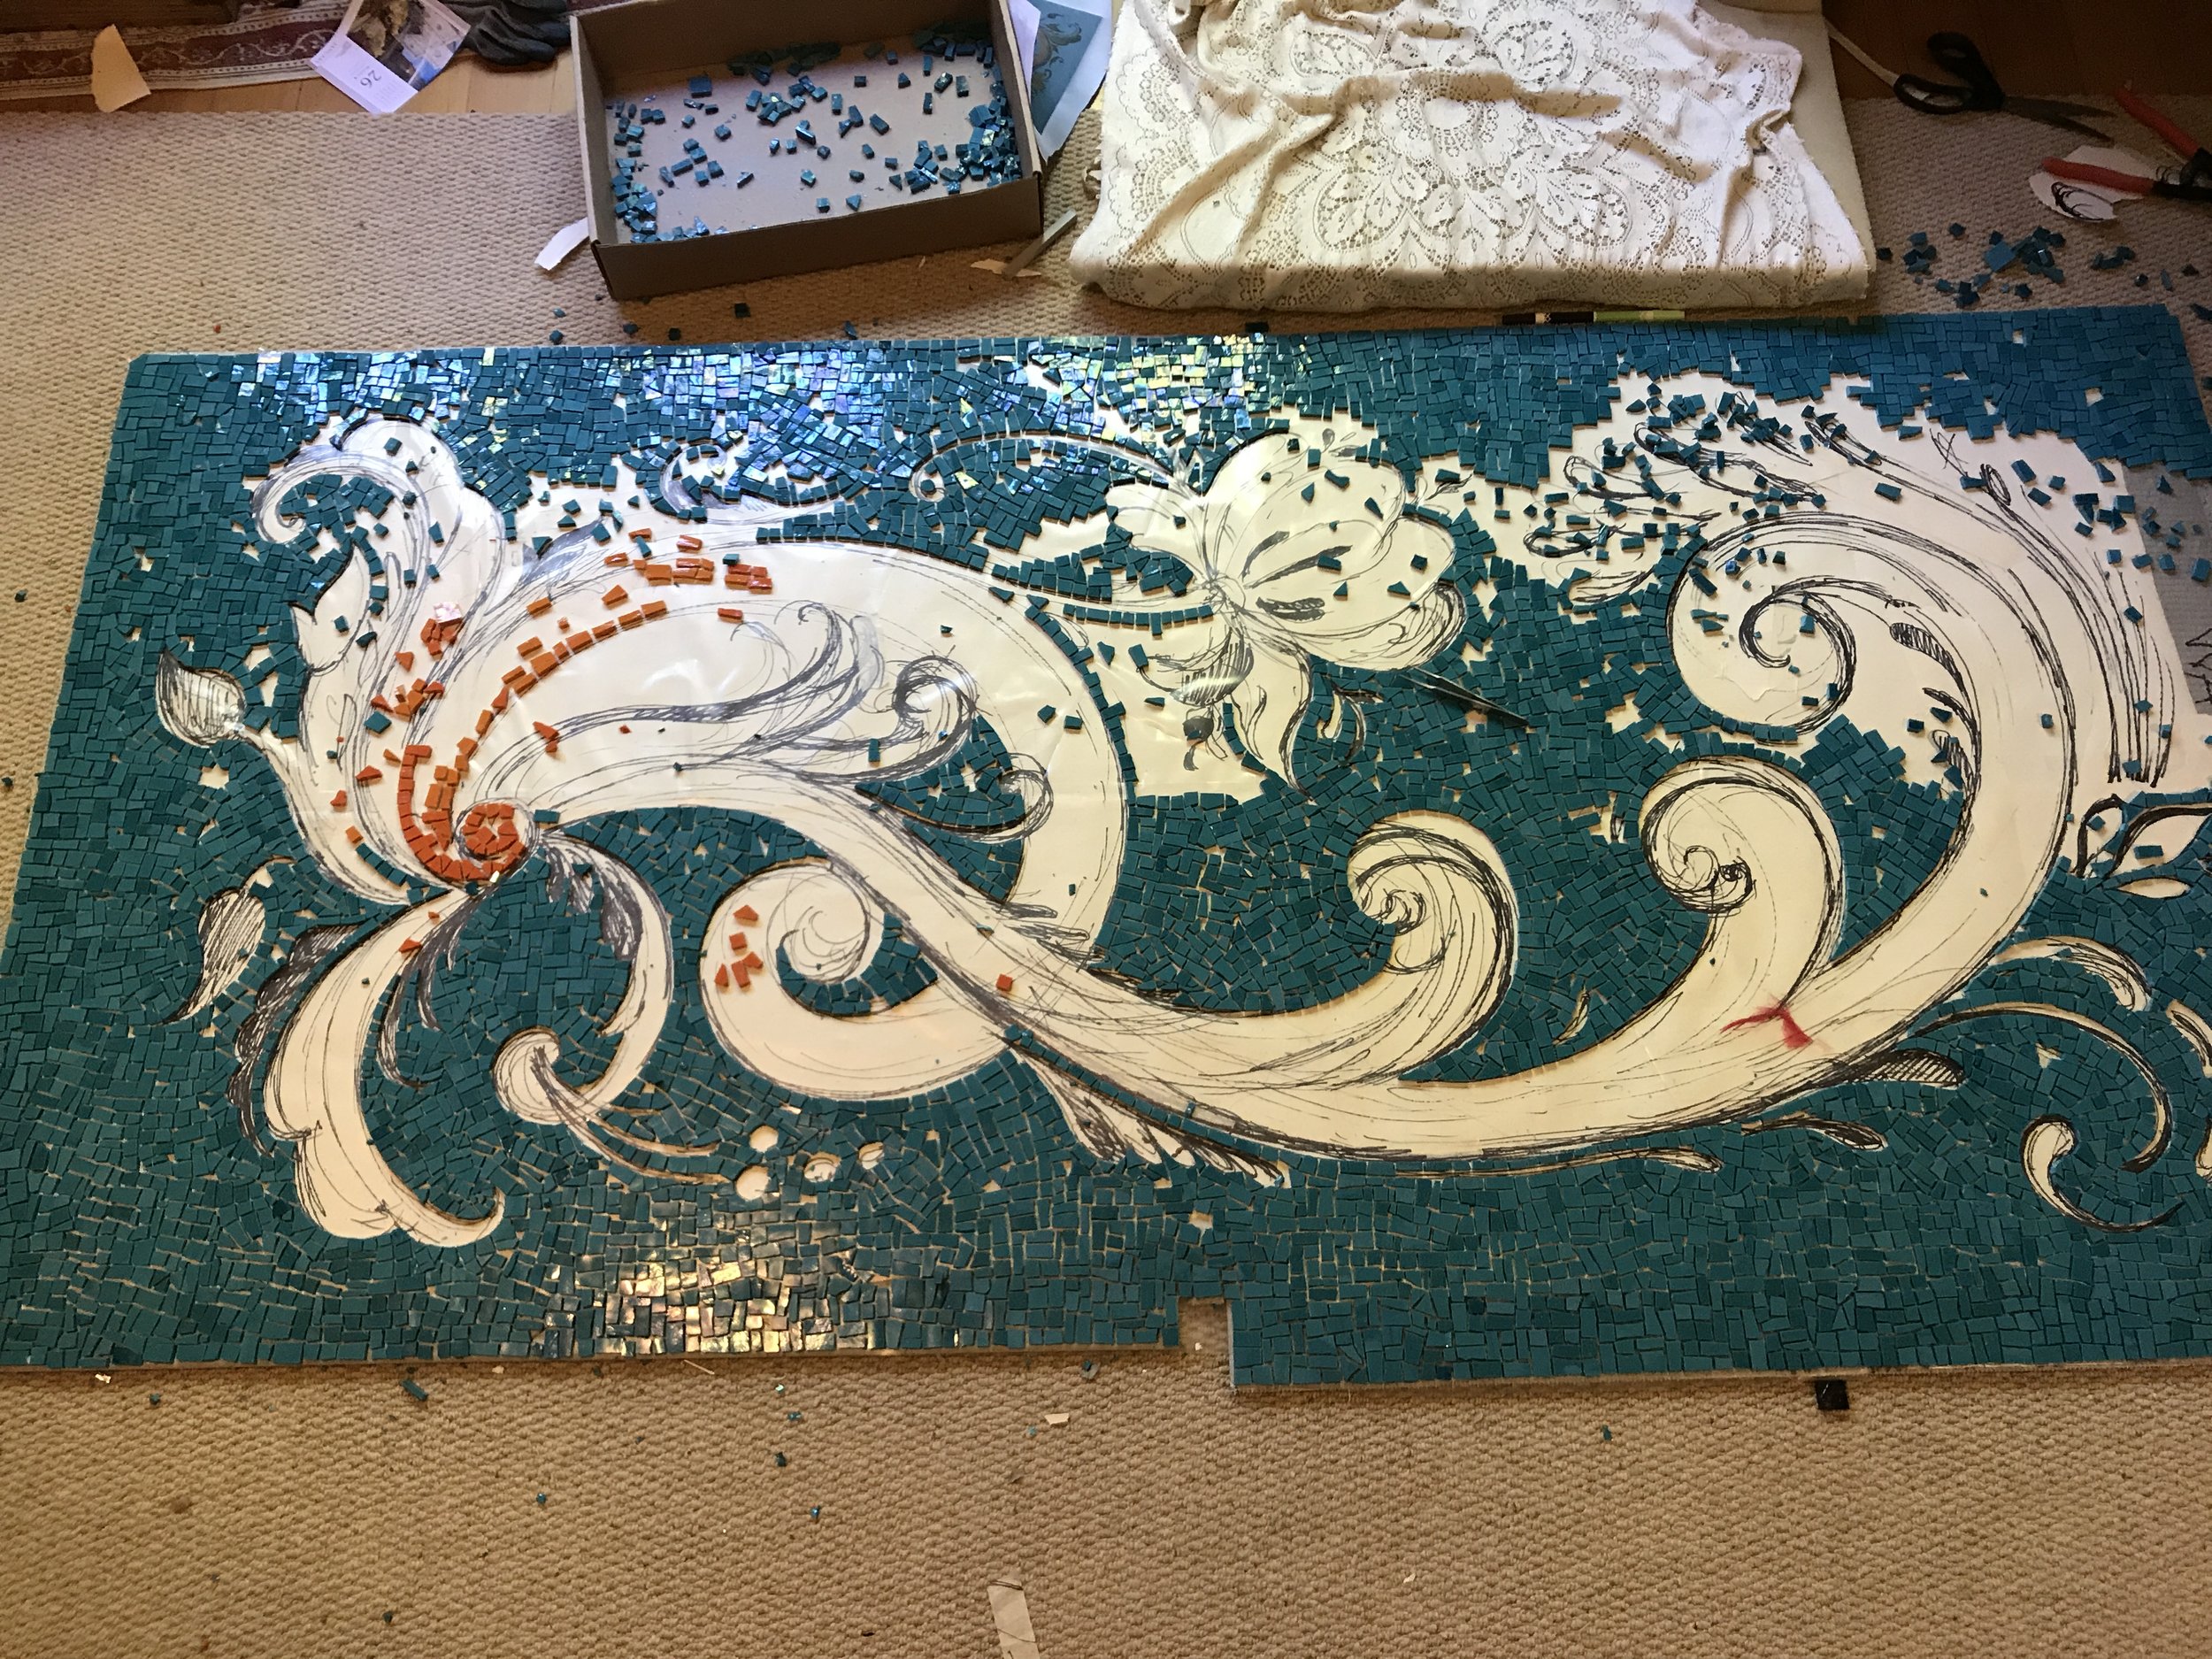
These art loving clients wanted a mosaic on this central landing in their home. When one of the designs reminded them of a painting they had, the idea came about to make this painting into the mosaic. We chose to use paistrina smalti as the material, a colorful glass made in Italy. Smalti has been used in mosaics for hundreds of years. Traditional smalti does not have a flat cut like the piastrina we chose, which turned out to be perfect for this floor application. Check out the process and finished mosaic below.
Pictured here is a completed mosaic floor that copied a special family heirloom painting.
Painting the design in the space so the client could get an idea of what it would look like
The original painting, painted by the client's aunt, is a traditional Scandinavian style of painting called Rosemaling.
A peak into the process of bringing this to life!
Almost there...
Once completed, a wide tape is added to the surface and the mosaic is divided into transportable pieces.
Here the mosaic has been set. It still has the plastic over the top that allowed it to be transported on site. The plastic was removed once the mosaic set and then grouted.
Working with color
Artist Maija Fiebig was ahead of the curve in 2017 when she chose to have me install this lovely Zellige tile for her kitchen backsplash.
When working with many handmade tiles, color batches will have significant color variation. It's important to mix all boxes before beginning installation.
There were four colors of this beautiful handmade Spanish tile I had to play with to determine the pattern and assure that the colors were properly distributed throughout the large bathroom.
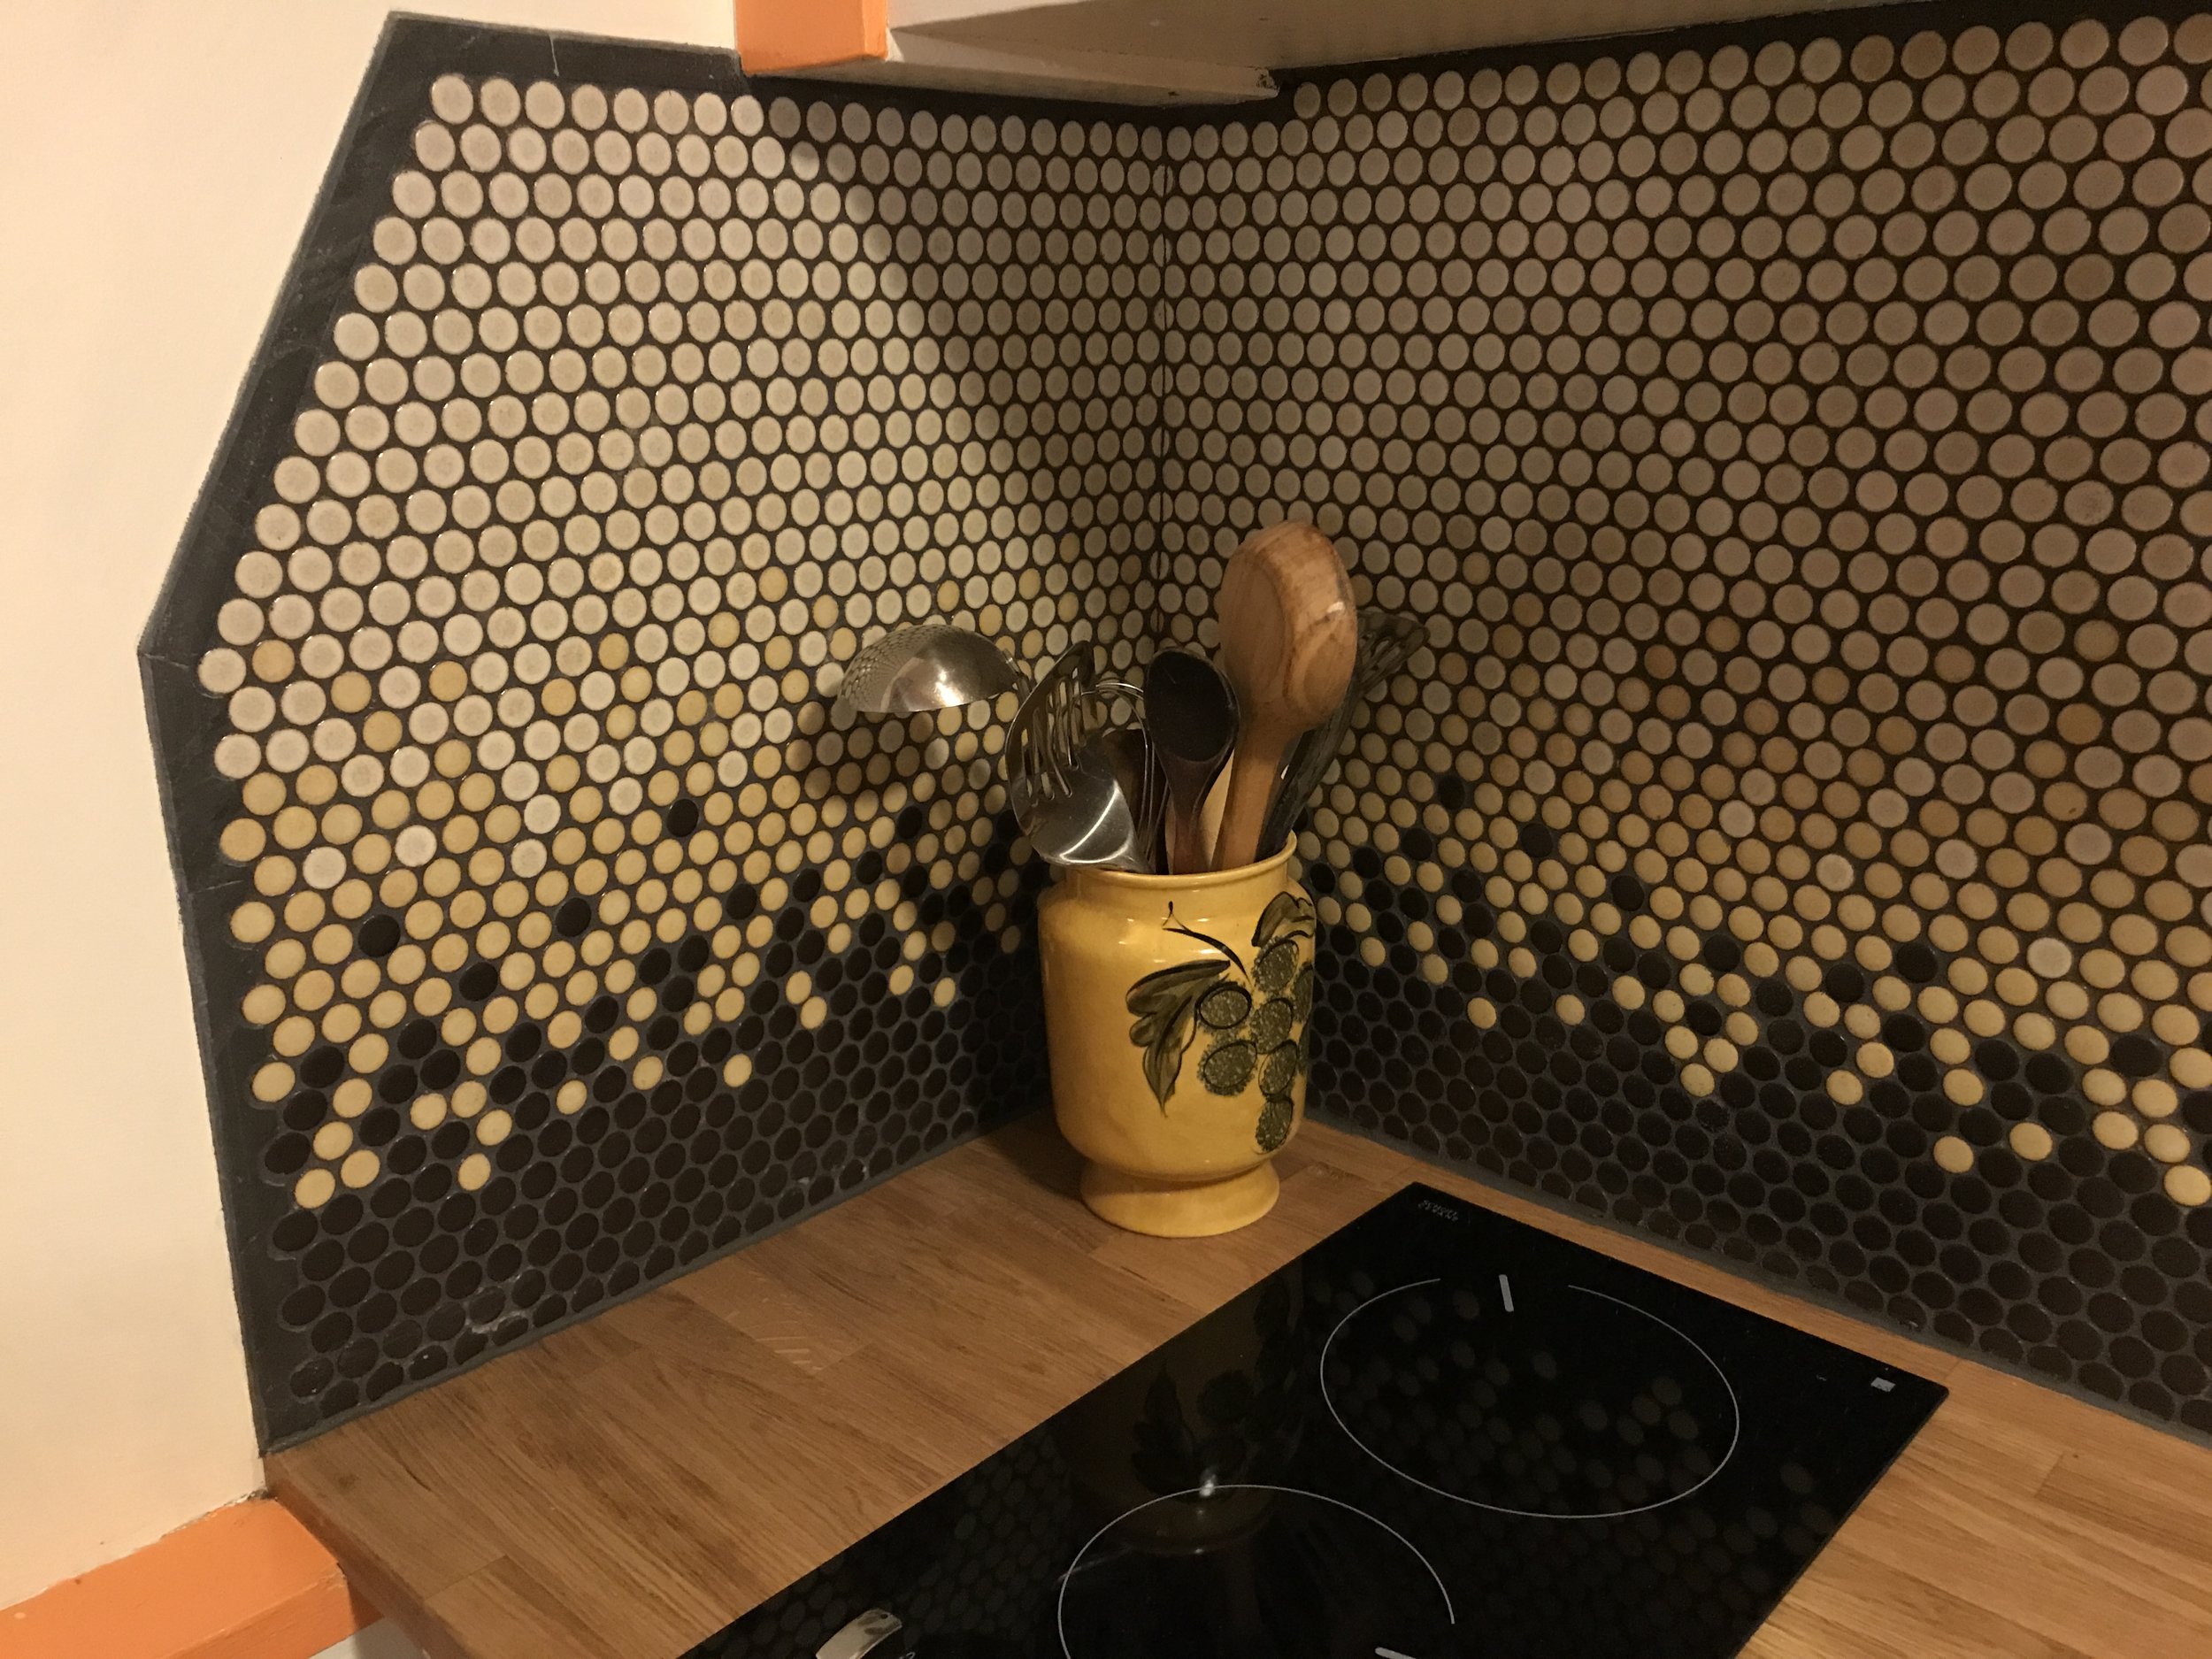
In this mother-in-law kitchenette we chose three different colors of penny round that would fade from one color to the next. I installed a wood butcher block counter and fabricated a border tile out of Brazilian black slate scraps I had.
The Details…
Scribed tile around some moulding.
We couldn't find a suitable trim for this marble mosaic but were able to find a scrap of marble that matched so that I could fabricate what we needed.
Small marble pieces interlock to create a beautiful wavelike pattern when completed.
It was important to have the right thickness of thinset so that the finished mosaic was flat, properly adhered and so that mortar did not come through the cracks.
Detail of the beveled corner between the windows.
Laying out the spiral for the hearth for this unique fireplace.
Tricky beveled cuts for these inset shower niches.
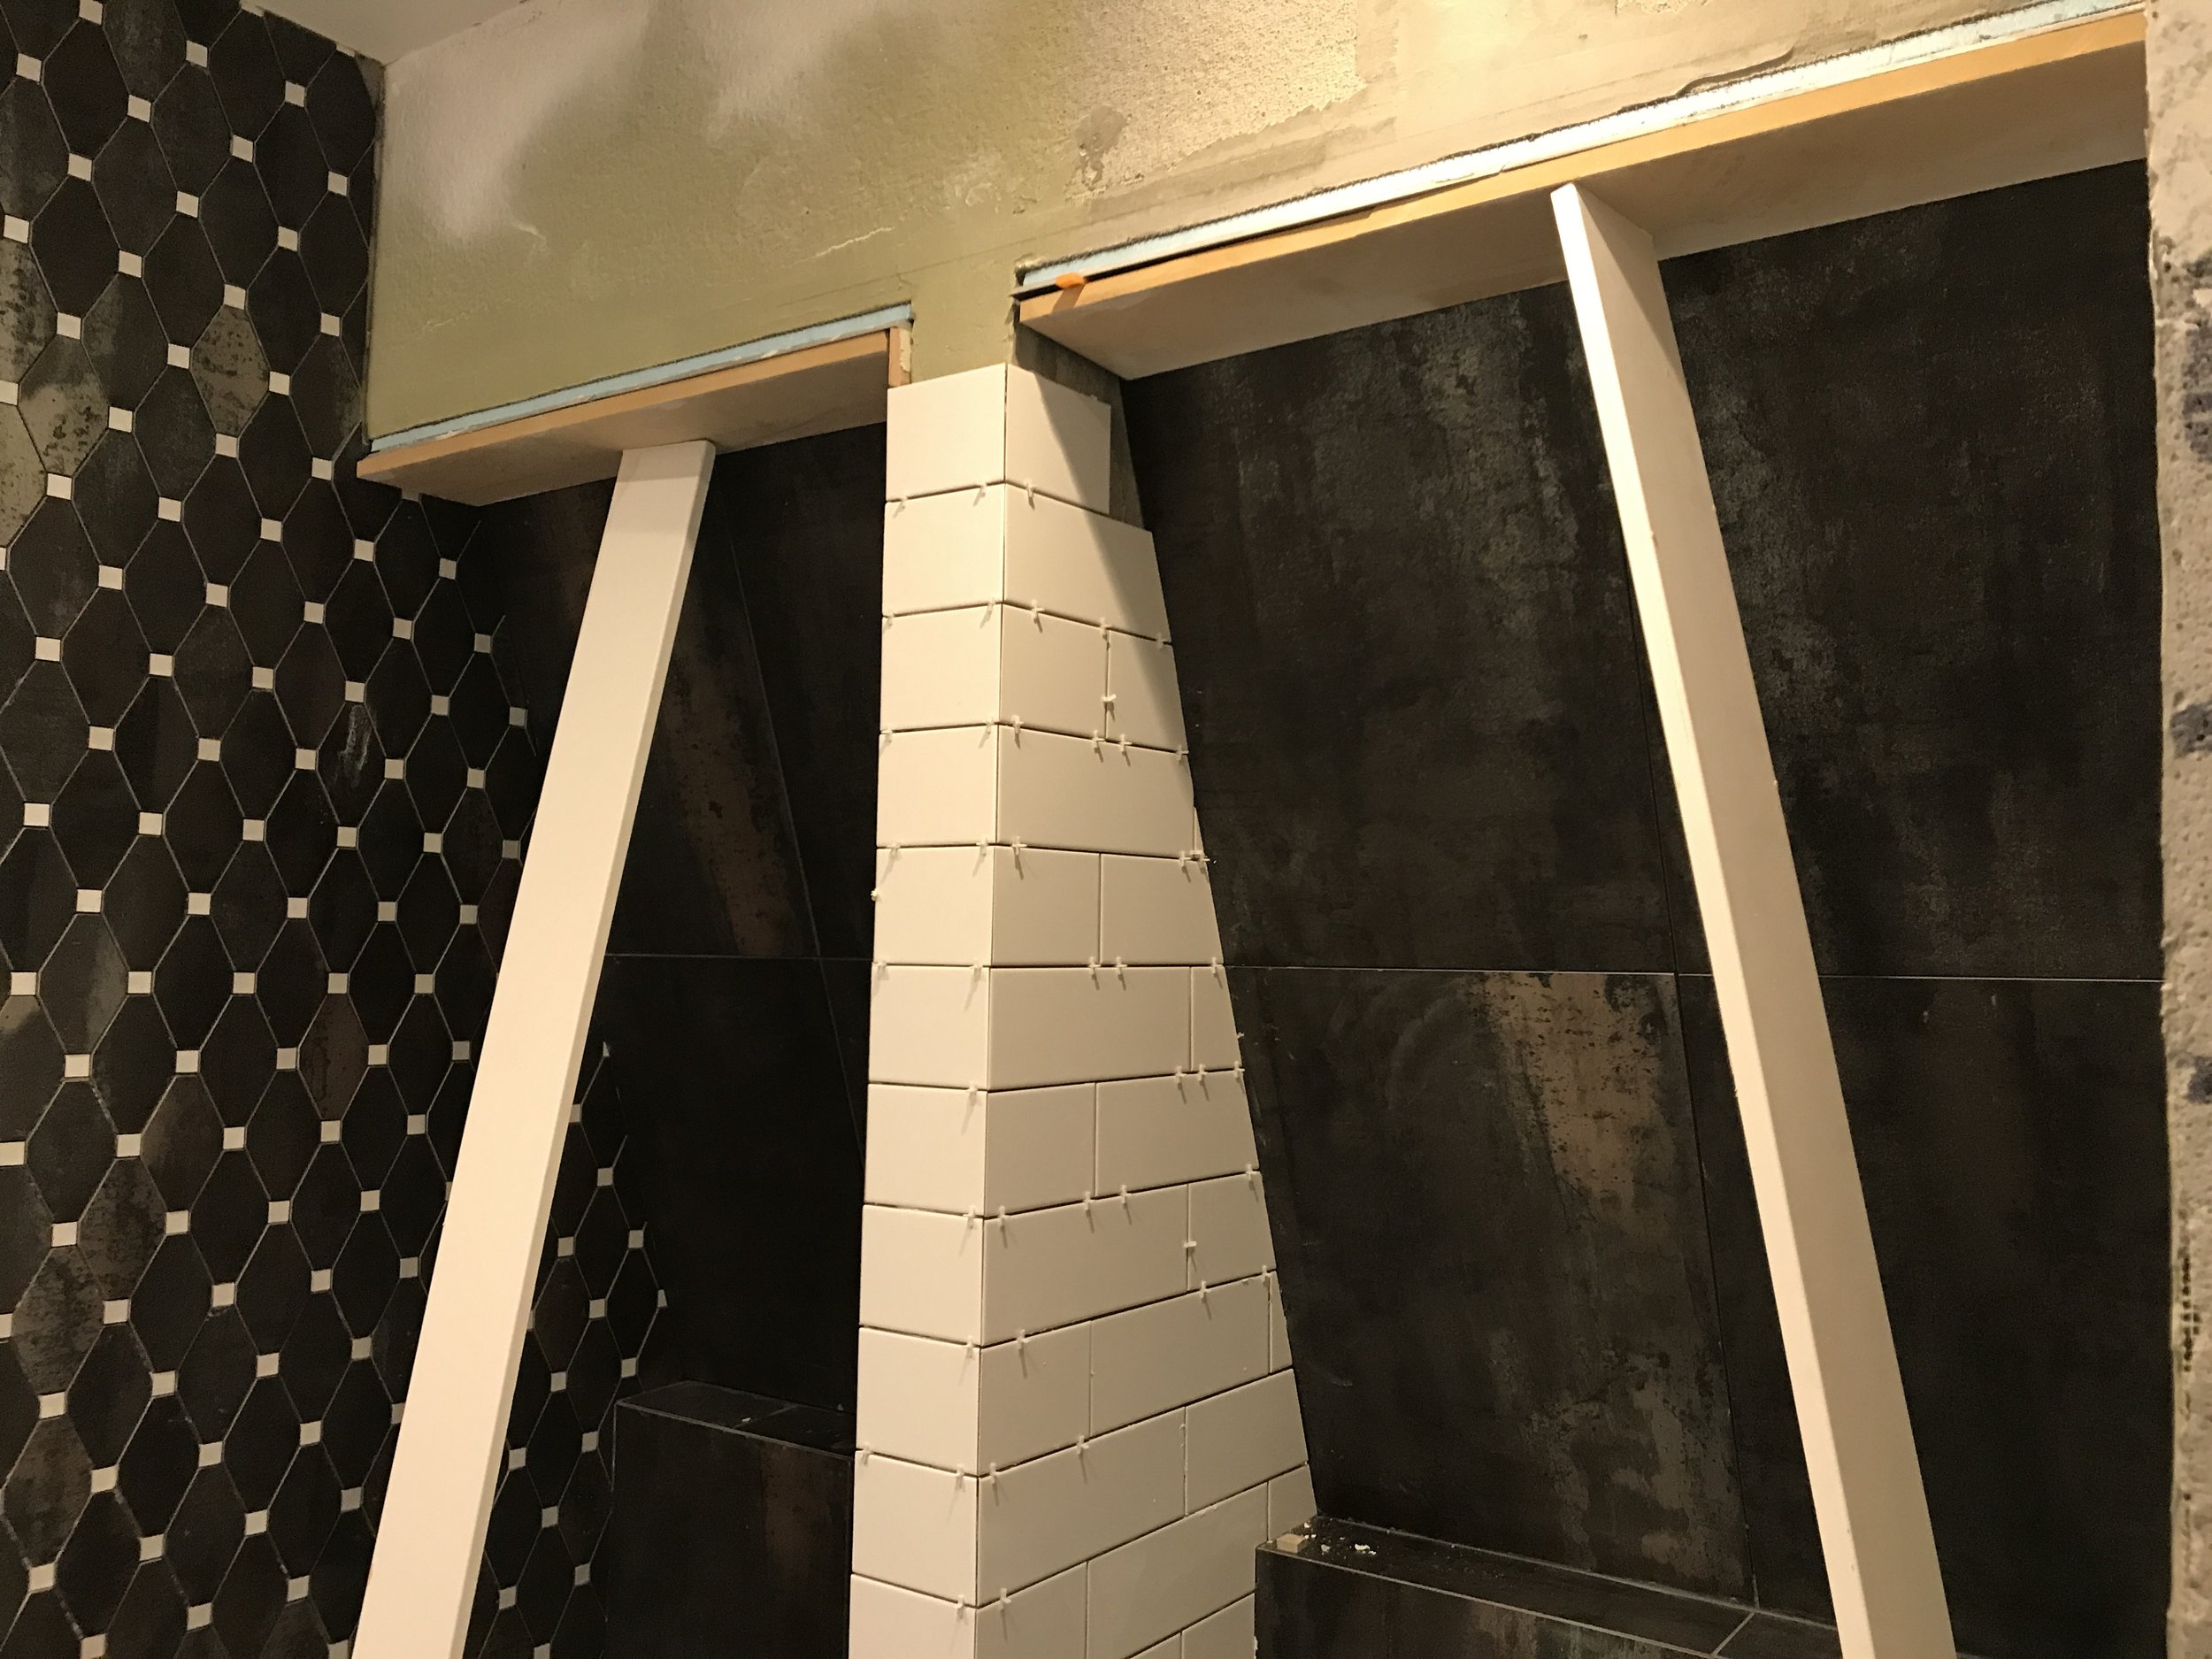
There is a lot going on here with the large format tiles set at a slant, mosaic tile on one wall and subway tile from floor to ceiling. Check out the finished bathroom in the Bathroom gallery.


